
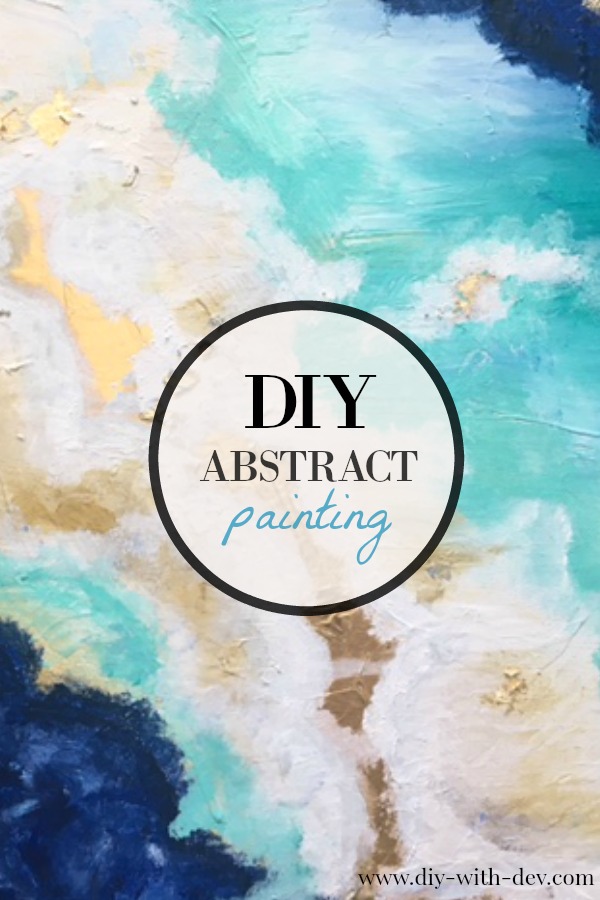
DIY Abstract Painting
So recently I had decided I was going to completely re-do my office. Well… I use the term office rather loosely in this case. It was more like a landing pad for all of the junk that we collected and didn’t really feel like putting away but wanted it behind a closed door so we didn’t have to see it.
Anyway, I decided I really need a space of my own so I can work on my website, blog, etc. without having to pull everything out and make a mess of my living room so – in comes office resurrection!
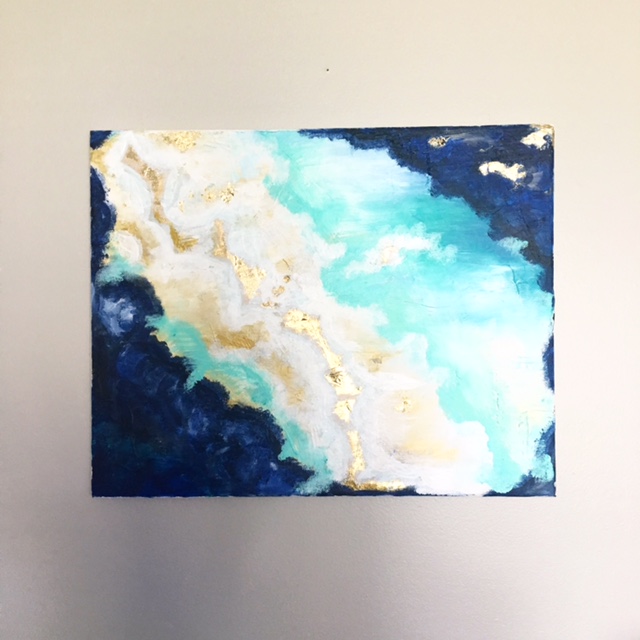
I got the hubby to clear everything out of that room. That was a task itself. I literally had a bathtub in there…. A BATHTUB. I then picked a nice neutral grey color for the walls with a crisp white trim. Very clean, simple, easy to look at office, but it needed a little color! I had seen these BEAUTIFUL paintings on pinterest while I was looking for office decor ideas. They had these beautifully rich colors and gold leaf accents – right up my ally. (I am a gold leaf fanatic.) I figured I would give it a try and you know what? It actually came out pretty good if I do say so myself!

Half way decent right? lol I might jazz it up a little bit with a bold gold frame to give it a nice polished finish but I think it came out pretty good for just a couple of hours of relaxation and creative expression!
This is the image that I got my inspiration from: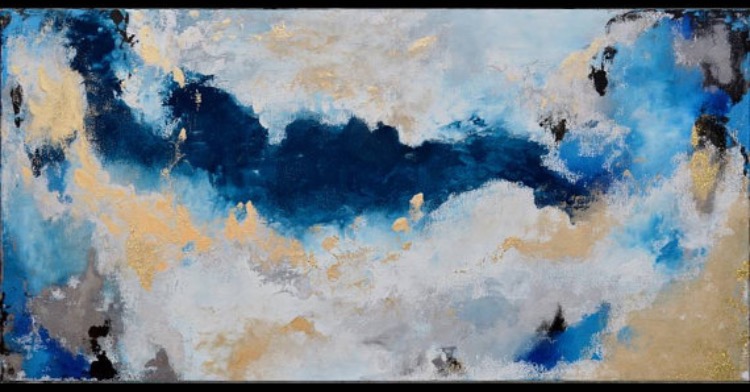
This one is obviously MUCH better than mine but the print alone is selling for like $500 and I would so much rather have a little fun and just make it myself!
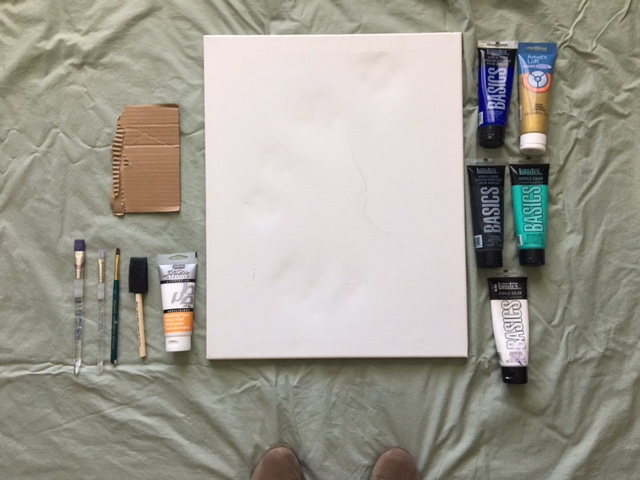
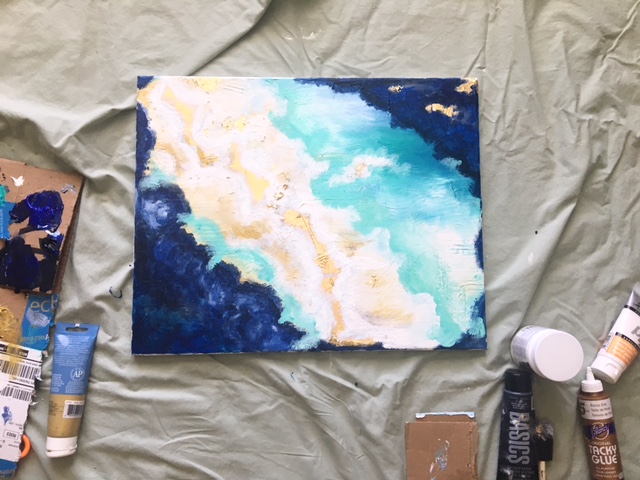
INGREDIENTS
1 crappy sheet to lay down so you don’t ruin your floor
Cardboard Box
Basics Acrylic Paint( This set is great if you don't already have paints at home)
Paint brush set
Large Canvas
Gold leaf foil (Preferably sheets and not the confetti style)
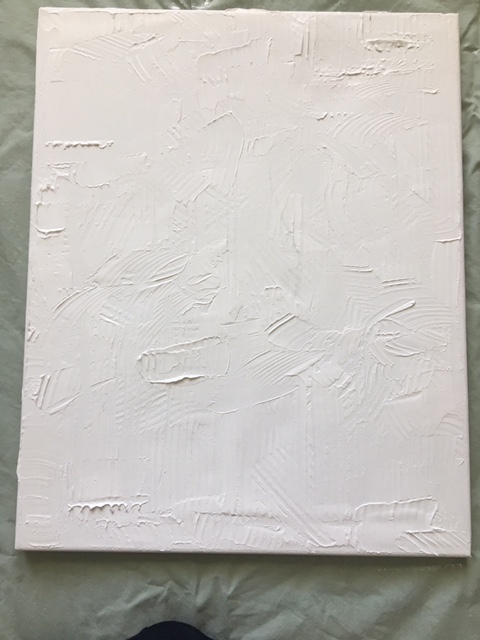
Excuse the paw prints on my canvas…. You might want to close the door if you will be working on the floor.
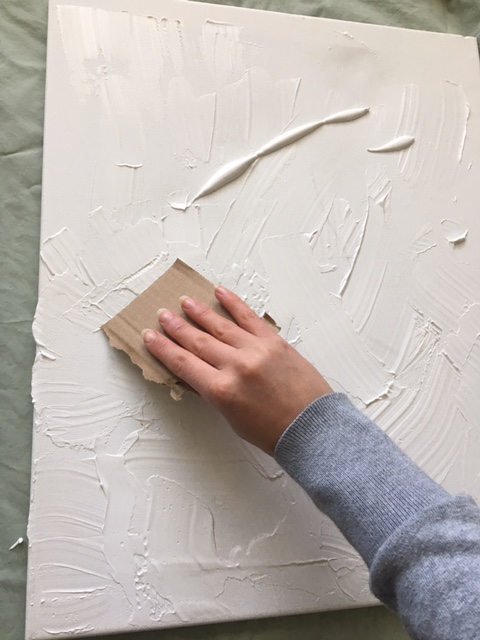
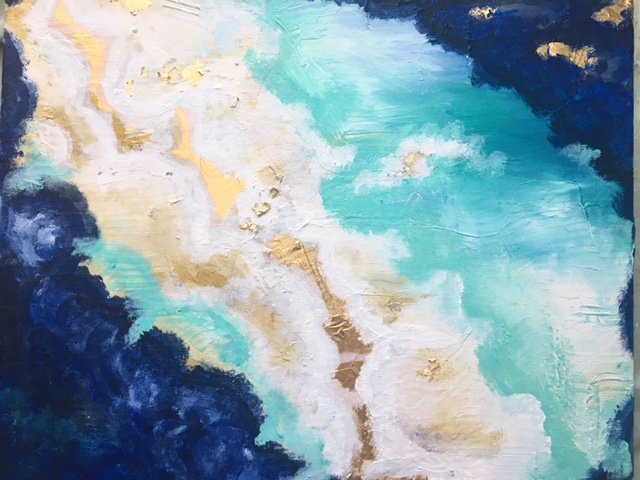
To start, I took my acrylic modeling paste and just squeezed the product onto my canvas.
Then I took my cardboard and ripped it into a small rectangle and used it to spread out the modeling paste. This step really helps add a lot of texture to the piece.
Once the product is laying on the canvas how you want, go ahead and add some of your gold foil. This is where I appreciate having the sheets compared to the tiny little confetti style you sometimes get from craft stores.
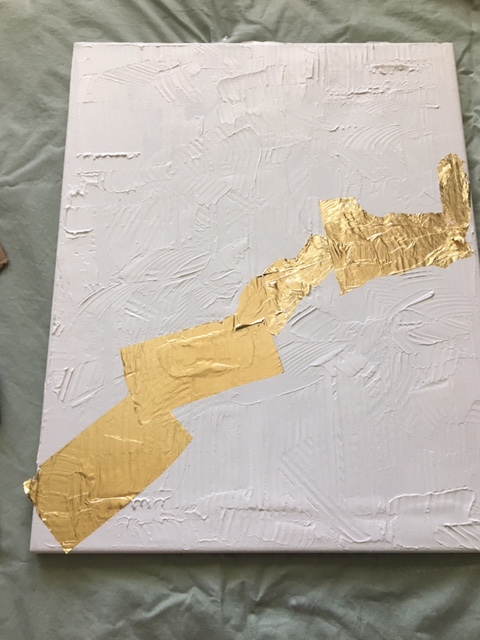
You will want to do this while the modeling paste is still wet so it sticks. Don’t worry about anything looking perfect. This is abstract right?! Let this dry for several hours. You can speed up the process by using a hair dryer if you are impatient like me. 🙂
Now its color time! I actually just used the rest of my cardboard box as a palette to mix my paints. Easy enough! I chose about 4 main colors for my painting: gold, white, teal, and dark blue but obviously you can use whatever colors you want. I would suggest keeping it at 5 or less, otherwise your colors might get lost in each other rather than compliment each other.
So I just laid down my main colors and used my finger to blend them nicely. You can actually finish your painting like this or you can keep adding more. I decided I wanted a little bit more structure to my painting so I added more fine lines.
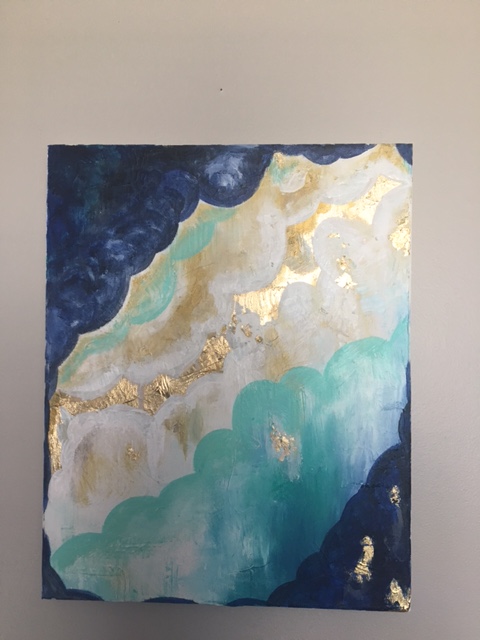
Then I decided that was too much structure so I softened all my lines with a paintbrush using a dabbing motion. Then I was finally satisfied!
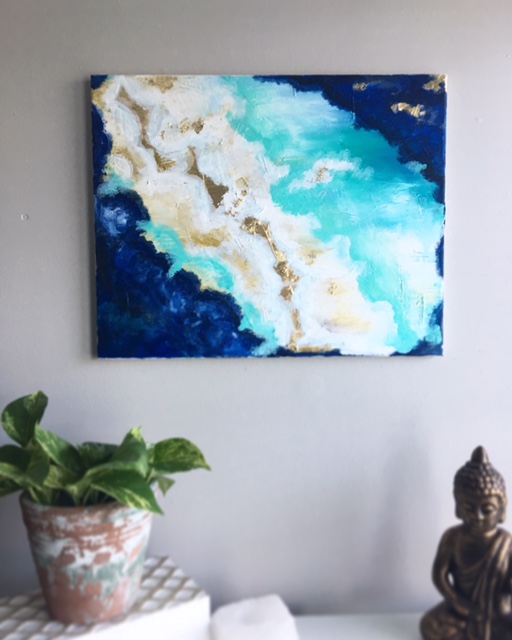
So there you have it! I’ll post an update on how beautiful it looks when I actually frame it. Happy painting everyone!!!
